Tutorial: Set up views and workspaces
Peach Commander shows two folders side by side, and almost everything about how each side looks is yours to arrange: the view mode, the sort order, which columns appear, and which folders are open as tabs. Once you have an arrangement you like, you can save the whole thing as a named workspace and bring it back with a single choice.
This tutorial walks through a realistic setup end to end. Our sample task: you are importing photos from a shoot on the left while keeping your project folders handy on the right, and you want to be able to return to exactly this layout next week. By the end you will have chosen a view mode, sorted and configured columns, opened the tabs you use, and saved it all as a workspace called "Photo import."
You do not need any files prepared in advance. Substitute your own folders wherever the steps mention a specific one.
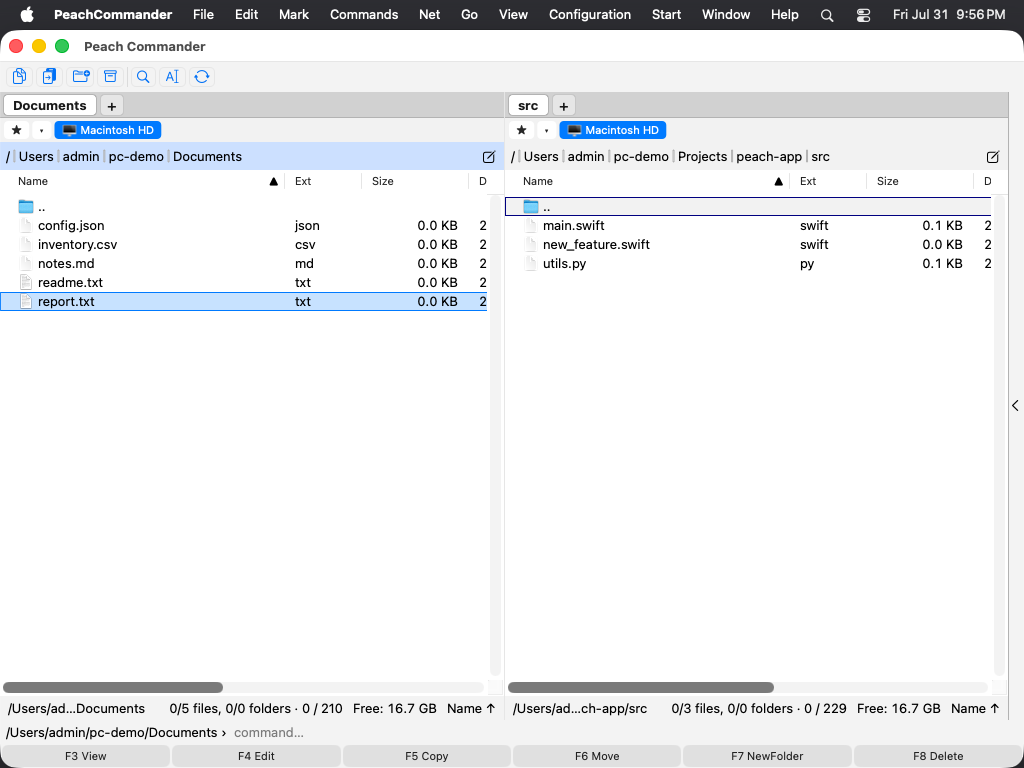 The dual-panel main window. The active panel has the highlighted title bar; new tabs and view changes always apply to it.
Step 1: Pick the active panel
Every view and tab change applies to the panel that is currently active, so start by choosing one.
- Click anywhere inside the left panel. Its title bar highlights to show it is now active.
- If you are ever unsure which side is active, press Tab to switch focus between the two panels and watch the highlight move.
We will set up the left panel as our photo-import view first.
Step 2: Navigate the left panel to your photos
- With the left panel active, go to the folder that holds the photos you want to review. You can double-click folders to drill in, or press Backspace (or double-click the
..entry) to go up one level. - For this tutorial, open a folder that contains a mix of image files, for example
~/Pictures/Shoot.
For more ways to move around, see Navigating.
Step 3: Switch the left panel to a gallery view
A grid of large thumbnails is the natural way to review photos.
- With the left panel active, open the View menu.
- Choose Thumbnails (Gallery). The file list changes to large previews. (The shortcut is Ctrl+Shift+F1.)
- If you want to compare modes quickly, press Cmd+Shift+M to cycle through Details, Brief, Icons, Gallery, and Tree. Stop on Gallery.
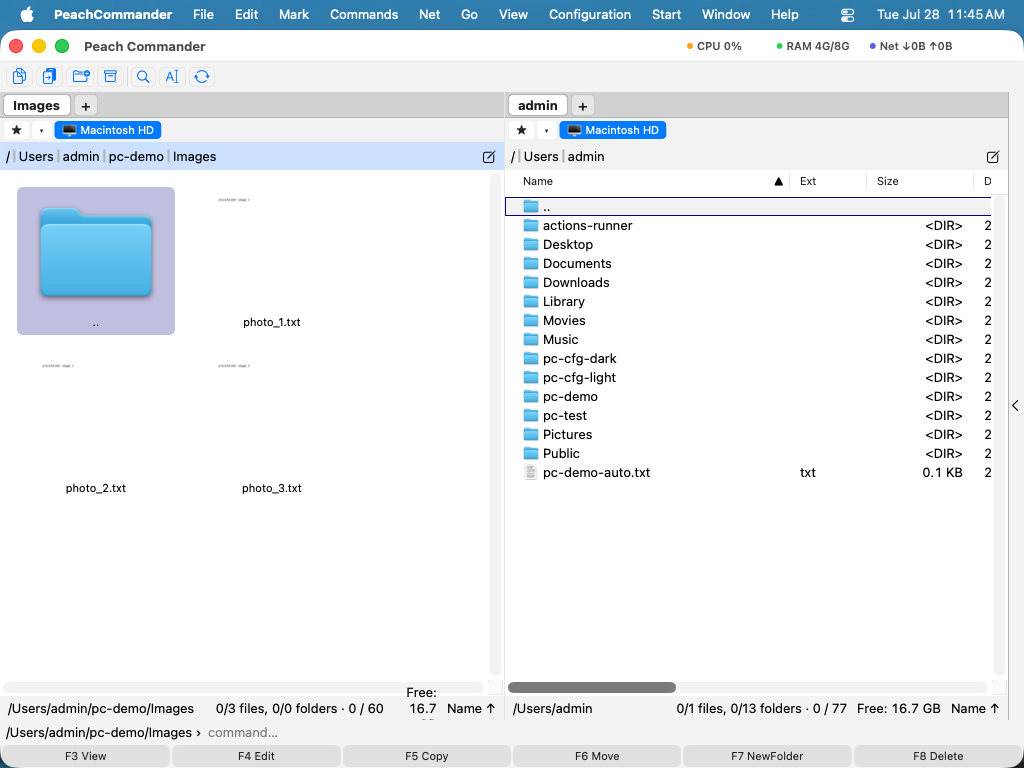 The five view modes. Gallery (thumbnails) suits photo review; Details suits column-based work.
View mode is remembered per panel, so the left side can stay a gallery while the right side stays a detailed list. For the full reference on every mode, see View modes & sorting.
Step 4: Sort the photos newest first
You will usually want the latest shots at the top.
- Keep the left panel active.
- Open View > Sort By and choose Date. Sorting by date puts the newest items first.
- To flip the order (oldest first), choose View > Sort By > Date again, or use the date shortcut Ctrl+F6.
Folders always group together at the top, and the .. entry that takes you up one level stays pinned first regardless of sort.
Step 5: Set up the right panel as a detailed list
Now switch sides and build the working view for your project folders.
- Press Tab (or click the right panel) to make the right panel active.
- Navigate it to your project folder, for example
~/Projects. - Open the View menu and choose Full (Details) to get the column list. (Shortcut: Ctrl+F2.)
- Sort by name: click the Name column header, or choose View > Sort By > Name. A small arrow in the header shows the sort column and direction; click the header again to reverse it.
Step 6: Choose which columns appear
The Details view lets you decide exactly which columns show, so you see only the information you care about.
- With the right panel active and in Details view, choose Configuration > Columns….
- Turn columns on or off and drag them into the order you want. Available columns include Name, Ext, Size, Date, Attr (attributes), Tags, and Comment.
- For a project folder, a useful set is Name, Size, Date, and Tags. Turn on Tags and turn off any columns you do not need.
- Apply your changes. Columns affect the active panel's Details view.
- Back in the panel, fine-tune widths by dragging the divider between two column headers.
Column choices, like view mode and sort order, are remembered per panel.
Step 7: Open tabs for the folders you use
Tabs keep several folders one click apart inside a single panel. Set up the tabs you expect to jump between.
- Make the right panel active.
- Press Cmd+T (or click the + at the end of the tab bar) to open a new tab. It opens on the current folder.
- In the new tab, navigate to a second project folder, for example
~/Projects/Website. - Add one more tab the same way and point it at, say,
~/Projects/Archive. - Switch between tabs with Cmd+} (next) and Cmd+{ (previous), or click a tab chip directly.
- On the left (gallery) panel, add a second tab for the folder you will copy photos into, for example
~/Pictures/2026/Selects. Now you can review in one tab and drop into another without losing your place.
Tip: if there is a folder you keep coming back to, select its tab and choose View > Lock Tab. A lock icon appears, and navigating elsewhere opens a new tab instead of moving the pinned one. See Tabs for the full set of tab actions.
Step 8: Make the arrangement a workspace
Now give the whole setup a name, so you can leave it and come back to it.
- Make one last check that both panels show what you want: the left as a date-sorted gallery with your review and destination tabs, the right as a name-sorted detailed list with your project tabs.
- Open the Go menu and choose Workspaces…, then New Workspace….
- Type a name, for example
Photo import, and confirm.
A strip of coloured chips appears across the top of the window, and a Workspace menu appears in the menu bar. Until this moment there was nothing of either to see — one workspace is the quiet state, and most people never leave it.
The workspace records the folders each panel shows, every open tab, which tab is active on each side, the view mode and the folder tree. It does not record the files themselves, so it stays valid as the folders' contents change.
Step 9: Work in it, and come back later
Carry on importing. Open tabs, navigate, change the sort order — the workspace keeps up with you, and there is nothing to save.
- Make a second workspace for a different job, say
Backups, with your source folder on one side and a backup drive on the other. - Click a chip, or press Ctrl+1 and Ctrl+2, to move between them. Both panels, all their tabs, the view mode and the back/forward history switch with you.
- Come back to
Photo importtomorrow and it is exactly as you left it — not as you last saved it, because you never had to.
If an afternoon of wandering has taken a workspace somewhere you did not intend, Workspace ▸ Reset to Saved State puts it back the way you set it up. Save Current State to Workspace (Cmd+Ctrl+S) makes wherever you are now the state it goes back to.
What to try next
- Give each workspace a colour from the chip's context menu, so you can tell them apart at a glance when the window is narrow.
- Add the folders you open most often to your favorites so new tabs are quicker to fill; see Favorites.
- Explore the rest of the view options, including natural (numeric) sorting and the Tree mode, in View modes & sorting, and the rest of what a workspace carries in Workspaces.