Tutorial: Work between two folders
Peach Commander shows two folders side by side, and almost everything you do is a move between them: pick items in one panel, send them to the other. This tutorial walks through a real, everyday task from start to finish — tidying up a Downloads folder into a project folder — so you can see how the two panels, the function keys, and the panel-sync shortcuts fit together.
By the end you will have copied a batch of files, moved another batch, pointed both panels at the same folder, swapped the panels, and dealt with a file that already existed at the destination.
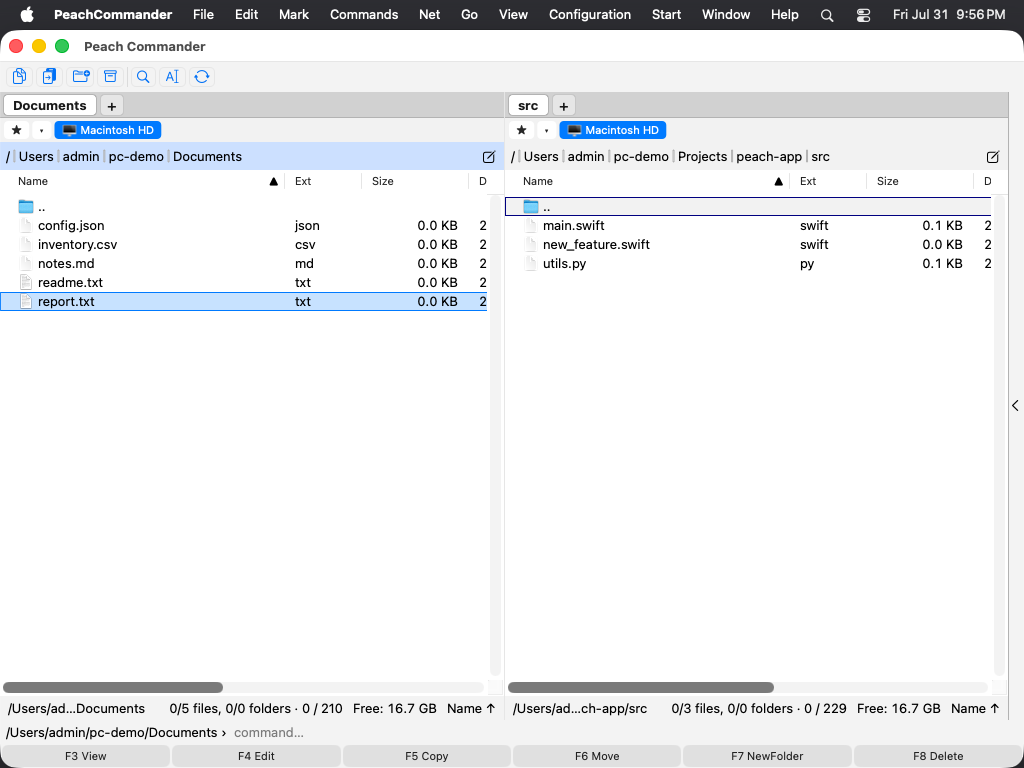 The two-panel layout: the active panel on the left, the destination on the right.
What you will need
- Peach Commander running (this is a pre-1.0 preview; if the app will not open, right-click its icon in Finder and choose Open once to clear the first-run warning).
- A
Downloadsfolder that contains a few files you want to sort — for this walkthrough, imagine three PDFs, two images, and a couple of installer files. - A project folder to sort them into. We will use
~/Projects/Peacheswith an emptydocssubfolder inside it.
Step 1 — Point the left panel at Downloads
- Click anywhere in the left panel to make it active. The active panel has a highlighted title bar and is the one every command acts on.
- Type the path directly: click the path bar at the top of the panel, type
~/Downloads, and press Return. (You can also click your way there folder by folder, or use the Go menu.) - The left panel now lists everything in
Downloads.
For more ways to move around — history, favorites, breadcrumbs — see Navigating.
Step 2 — Point the right panel at your project
- Press Tab to jump to the right panel. Tab always switches which panel is active, so you rarely need the mouse.
- In the right panel's path bar, type
~/Projects/Peachesand press Return. - Double-click the
docsfolder to open it. The right panel now shows the (empty) destination.
You now have the source on the left and the destination on the right — the standard setup for any copy or move.
Step 3 — Select a batch and copy it with F5
Let's copy the three PDFs into docs.
- Press Tab to make the left panel active again.
- Mark the files you want. Click the first PDF, then hold Cmd and click the other two so all three are marked. Marked rows stand out in a different name color. (Prefer the keyboard? Move the cursor to a file and press the Spacebar to toggle its mark, or Insert to mark and step down.) See Selecting files for every selection trick.
- Press F5. The copy dialog opens with the destination path already filled in — it points at
~/Projects/Peaches/docs, the folder open in the other panel. - Confirm to start. A progress window shows the current file and the overall job; large copies can be paused or sent to the background.
The three PDFs now exist in both panels — copying leaves the originals in place. For copy options like only newer files or renaming with a wildcard mask, see Copying files.
Step 4 — Select another batch and move it with F6
The two installer files don't belong in Downloads anymore, so move them instead of copying.
- Still in the left panel, clear the previous marks (choose Mark > Unselect All, or press Cmd+A then click once to reset). Then mark the two installer files.
- Press F6. The move dialog opens, again pre-filled with the right panel's folder as the target.
- Confirm to start. Because Downloads and the project folder are usually on the same drive, the move finishes almost instantly.
The installers vanish from the left panel and appear on the right — moving relocates files rather than duplicating them. See Moving & renaming for renaming in place and renaming while you move.
Step 5 — Line the panels up with target = source (Ctrl+=)
Suppose you now want to work entirely inside docs — for example, to make a subfolder and drop the images into it. The fastest way to get both panels there is to copy the active panel's location to the other panel.
- Make sure the panel showing
~/Projects/Peaches/docsis active (press Tab if needed). - Press Ctrl+= (target = source). The other panel jumps to the same folder, so both panels now show
docs.
This is especially handy right before a copy or move when you want the source and destination to start from the same place.
Step 6 — Swap the panels with Ctrl+U
Maybe you decided the layout feels backwards — you'd rather have the project on the left and Downloads on the right. Instead of retyping paths:
- Press Ctrl+U. The two panels trade sides: whatever was on the left is now on the right and vice versa.
- (If you have several tabs open per panel and want them to travel too, press Ctrl+Shift+U to swap the panels including all their tabs.)
Ctrl+U is a quick way to reverse the direction of your next copy without touching the path bars.
Step 7 — Handle a file that already exists
Now copy the two images into docs. Imagine one of them, logo.png, was copied there in an earlier session, so the copy will collide.
- In the panel showing your images, mark both image files.
- Press F5 and confirm. Peach Commander copies the first image with no trouble, then stops at
logo.pngbecause a file with that name is already in the destination. - The overwrite dialog appears, comparing the existing file with the incoming one so you can decide. Your choices include:
- Overwrite the existing file — or Overwrite all to apply that to every remaining conflict.
- Skip this file, or Skip all.
- Rename the incoming copy so both files are kept.
- Overwrite only when the source is newer or larger than the file already there.
- For this task, choose Overwrite (you want the fresh logo). The copy finishes.
After any copy, move, or delete, items that were handled successfully are unmarked automatically, while anything that failed stays marked so you can retry it. The full list of overwrite options lives in Copying files.
What you learned
| Task | How |
|---|---|
| Switch the active panel | Tab |
| Set a panel's folder | Type a path in the path bar and press Return |
| Mark a batch of files | Cmd+click, Shift+click, Space, or Insert |
| Copy the selection to the other panel | F5 |
| Move the selection to the other panel | F6 |
| Point the other panel at this folder (target = source) | Ctrl+= |
| Swap the two panels | Ctrl+U |
From here, try the same flow with folders instead of files (they copy with everything inside), or learn to rename many files at once with the Multi-Rename Tool.